RECIPE: RUSTIC APPLE PIE WITH EASY TO MAKE PIE CRUST

Note: I have made this recipe without referencing it for so long, I needed to change the online version so it matches with my current method. I added a bit more flour and reduced the oven by 5 degrees. The rest is the same.

This may be my favorite recipe! You can’t believe how fast and easy you can make a pie! My mom made a pie every single day- most were fruit pies and I always marveled at how fast she could make one. I have used just about everything inside of this pie crust but just make sure the dough is well chilled and the filling is not too juicy or it won’t hold together. The egg wash will act as a glue to keep it sealed. The glaze, if you decide to use one, will make it look like it came from a bakery but it is flakier without it.

To the left is an apple pie I made in minutes. On the right is the same crust, with local Chilton County peaches and blackberries and blueberries from my yard. Note: If you use frozen fruit for the filling, be sure to up the flour a bit so the filling is not too juicy to hold.

You can use this homemade pie crust to make almost any kind of pie, tart, pot pie, or crostata. Leave out the sugar for a savory pie The dough can hold up to a week in the refrigerator before you roll it out. You can make ahead and freeze it, also.

RUSTIC APPLE PIE

Prep Time: 20 minutes plus 1 hour chill time for the dough

Cook Time: 20-25 minutes

INGREDIENTS

Pastry

1 cup all-purpose flour, plus 3 tablespoons and more for dusting to roll out the dough

2 tablespoons granulated or superfine sugar plus 1/2 tablespoon to sprinkle on crust

1/4 teaspoon kosher salt

1/4 pound (1 stick) very cold unsalted butter, diced into cubes

3 tablespoons ice water plus 1 to 1½ more depending on how dough comes together

Filling

11/2 pounds apples (3 large semi-tart apples work best)

1/4 teaspoon grated lemon zest

1-2 teaspoons fresh lemon juice (juice of a whole lemon, essentially)

1/4 cup flour

1/4 cup granulated sugar

1/4 teaspoon kosher salt

1/2 teaspoon ground cinnamon

1/8 teaspoon ground allspice

1 tablespoon cold unsalted butter, diced into small pieces

Egg Wash (optional)

1 egg, well beaten

Glaze (optional)

½ cup Orange Marmalade, Apricot Preserves, or Apple Jelly

Directions:

Preheat the oven to 420 degrees F. Line a baking sheet with parchment paper. Stretch a large piece of plastic wrap out on the counter and dust with flour, about 1 tablespoon.

For the pastry, place the flour, sugar, and salt in the bowl of a food processor fitted with a steel blade. Pulse a few times to combine the dry ingredients. Add the cold cubed butter, a little at a time, pulsing between additions until the butter is the size of peas. Repeat until all the butter is in the bowl but pulse as little as possible. You want to see flecks of butter in the dough.

Next, with the motor running, add the ice water a tablespoon at a time through the feed tube-stop the machine just before the dough becomes a solid mass. Turn the dough onto the well-floured plastic wrap. Handle as little as possible. Form into a round (or whatever shape you want to roll out for the pie.) Don’t over handle or knead or the butter will melt. Fold the plastic around the disc. Refrigerate for at least 1 hour. When you are ready to make the crostata, remove the disc from the refrigerator and allow it to sit on the counter for at least 5 minutes before you begin.

To roll out: Unfold the plastic Flour a rolling pin and put a little flour around the plastic and on both sides of the dough; roll the pastry into an 11-13” circle on the plastic wrap. Add flour as you need to so the dough does not stick. Wrap it over the rolling pin and transfer it to a baking sheet. Remove the plastic wrap.

For the filling, peel, core, and cut the apples. I like the look of slices- I usually slice my apples like this: cut 4 pieces, cutting around the core. Then slice those into half moon shapes. You can leave the peel on if you like but I usually don’t because you need the apples to look perfect if the peel is on. Put the apple into a bowl and toss with the lemon juice and the lemon zest. Next, add the flour, sugar, salt, cinnamon, and allspice. Add the cold butter. Mix all of the ingredients together until the apples are well coated. Turn the apples out onto the crust, leaving a 1 1/2 to 2 inch border all the way around.  Gently fold the border over the apples to enclose the dough, pleating it to make a circle. Finish with the egg wash to seal the folds and sprinkle with granulated sugar over the top and crust before baking.

Bake the crostata for 20-23 minutes, until the crust is nicely browned and the apples are tender. (Note: If you are not using the glaze, bake for another 5-7 minutes or until golden brown)

For the glaze: Microwave the preserves in a heatproof container for 10 seconds. Careful! It will bubble and be HOT! Remove the crostata from the oven. Using a pastry brush, lightly brush the filling and the crust with the melted preserves. Return to the oven for 5-7 minutes or until the pie is golden brown.

Allow to cool slightly- at least 10 minutes before cutting. Add caramel sauce or a scoop of ice cream and it is even better! Hope you enjoy this recipe as much as I have. xox

Print Friendly and PDF

FALL FAVORITE RECIPES: PUMPKIN SPICE CHEESECAKE WITH SOUR CREAM TOPPING

My niece has a birthday in October and this became her requested birthday cake after she had it at California Pizza Kitchen. Here’s my version; it’s creamy and spicy from the ginger and the gingersnap crust. I think it’s better than the original. It may seem complicated to make but it is not hard- just takes some time but worth it, especially for a special girl!  

My Pumpkin Spice Cheesecake is spicy, creamy, and tastes better than those lattes we look forward to all year long!

My Pumpkin Spice Cheesecake is spicy, creamy, and tastes better than those lattes we look forward to all year long!

Prep Time: 45 minutes

Cook Time: 1 hour plus 10 minutes and 10 hours to chill

 INGREDIENTS

35 gingersnap cookies

5 tablespoons unsalted butter, melted

1/4 cup granulated sugar

4 bricks cream cheese, 8 ounces each

1 cup brown sugar

2 tablespoons maple syrup

1 cup canned pumpkin puree

3 tablespoons all-purpose flour

4 large eggs, room temperature

½ teaspoon lemon juice

2 tablespoons pumpkin pie spice

1/8 teaspoon ground ginger

1 tablespoon vanilla extract

1/2 teaspoon salt

2 cups sour cream

1/3 cup Confectioners' sugar

1 teaspoon vanilla

Tiny squeeze lemon juice

Pinch nutmeg

 DIRECTIONS:

Preheat the oven to 350 degrees. Prepare a 9” springform pan by inserting the bottom and then wrapping the bottom with two layers of foil so water from the water bath will not seep in. Get a large baking pan with sides for the water bath.  

For the crust: Melt butter. Put the gingersnaps and sugar in food processor until they are coarse crumbs. Add the melted butter. Toss with a fork to combine together. Press into the bottom and slightly on the sides of a buttered springform pan. Bake the crust for 12 minutes or until golden brown. Don’t let it get too dark. Let cool on a rack. 

For the filling: In a large mixing bowl, cream the cheese and sugar together on medium speed,  just until creamy and light. Add the maple syrup. Reduce the speed to low. Add the flour, a little at a time. Add the eggs, one at a time, making sure the first one is incorporated before adding the next one. Next, add the puree, lemon juice, spices, vanilla, and salt.   

For the topping: Mix together sour cream, sugar, nutmeg, and lemon juice. Set aside for later.

Spoon the filling into the springform pan on top of the crust. Check the foil around the edges of the springform pan to make sure no water leaks in. Place the filled springform pan in the baking pan and put the baking pan in the oven. Carefully pour warm water halfway up the sides of the springform pan. Bake at 350 for 60-70 minutes or until the edges are set but the middle is not quite set; it will set as it cools. Add the topping and bake for an additional 10 minutes. Carefully remove the springform pan from the water bath to a rack and let it cool for 10 minutes. Run a knife around the edge of the pan to loosen but don’t remove the sides. Cool another hour then transfer to the refrigerator and let chill for at least 10 hours. Longer is even better. Remove the sides of the pan and let stand for 20 minutes at room temperature before slicing.

Print Friendly and PDF

NATIONAL S'MORES DAY: MAKE INDOOR S'MORES, S'MORES POPS, S'MORES BAR AND MORE!

August 10th is National S'mores Day... and in celebration of that summertime treat, here are a few of my favorite ways to enjoy them and you won't even need to build a fire for some of these versions!

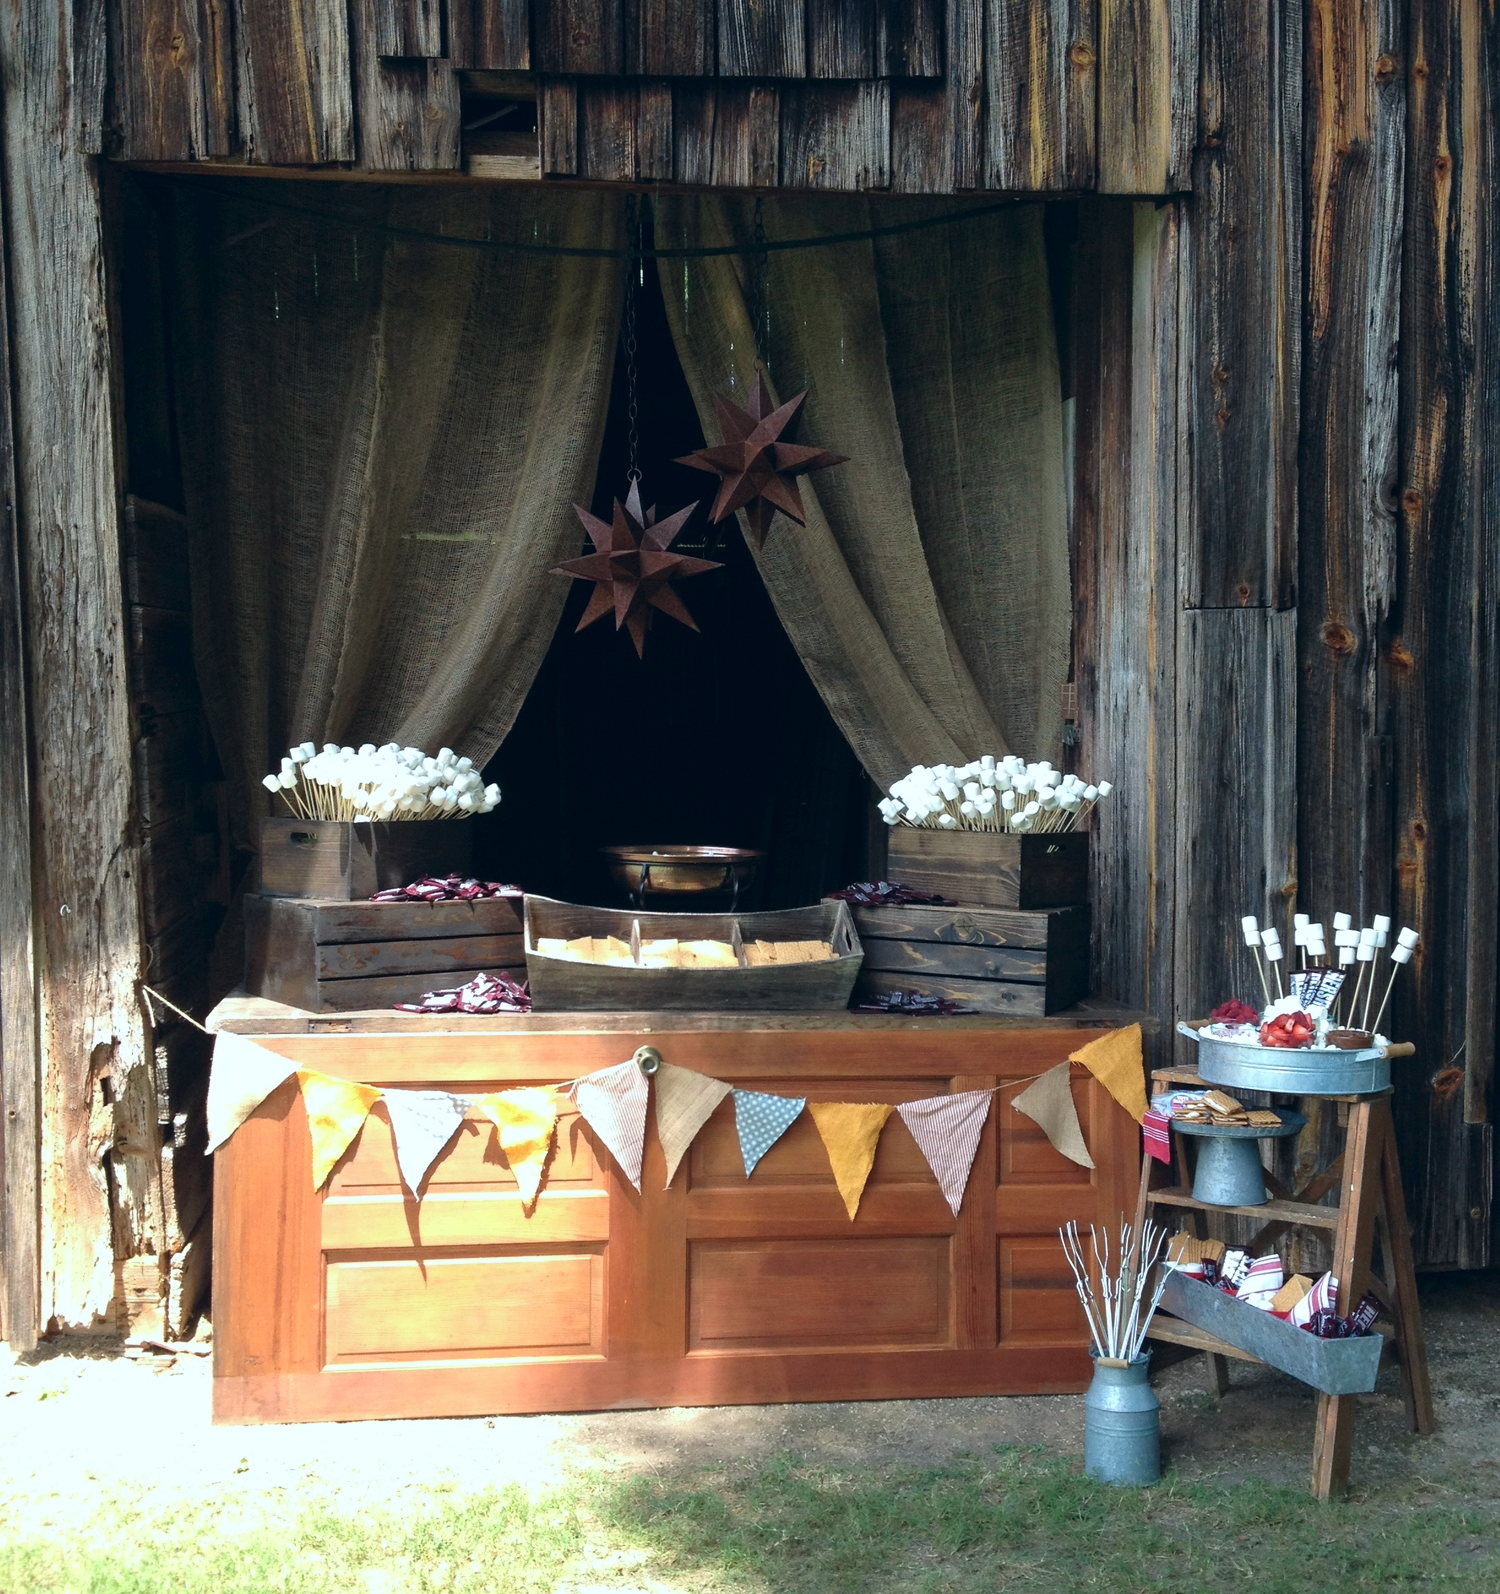
Create a S'mores Bar for a party, wedding, or simple backyard fun...

Create a S'mores Bar for a party, wedding, or simple backyard fun...

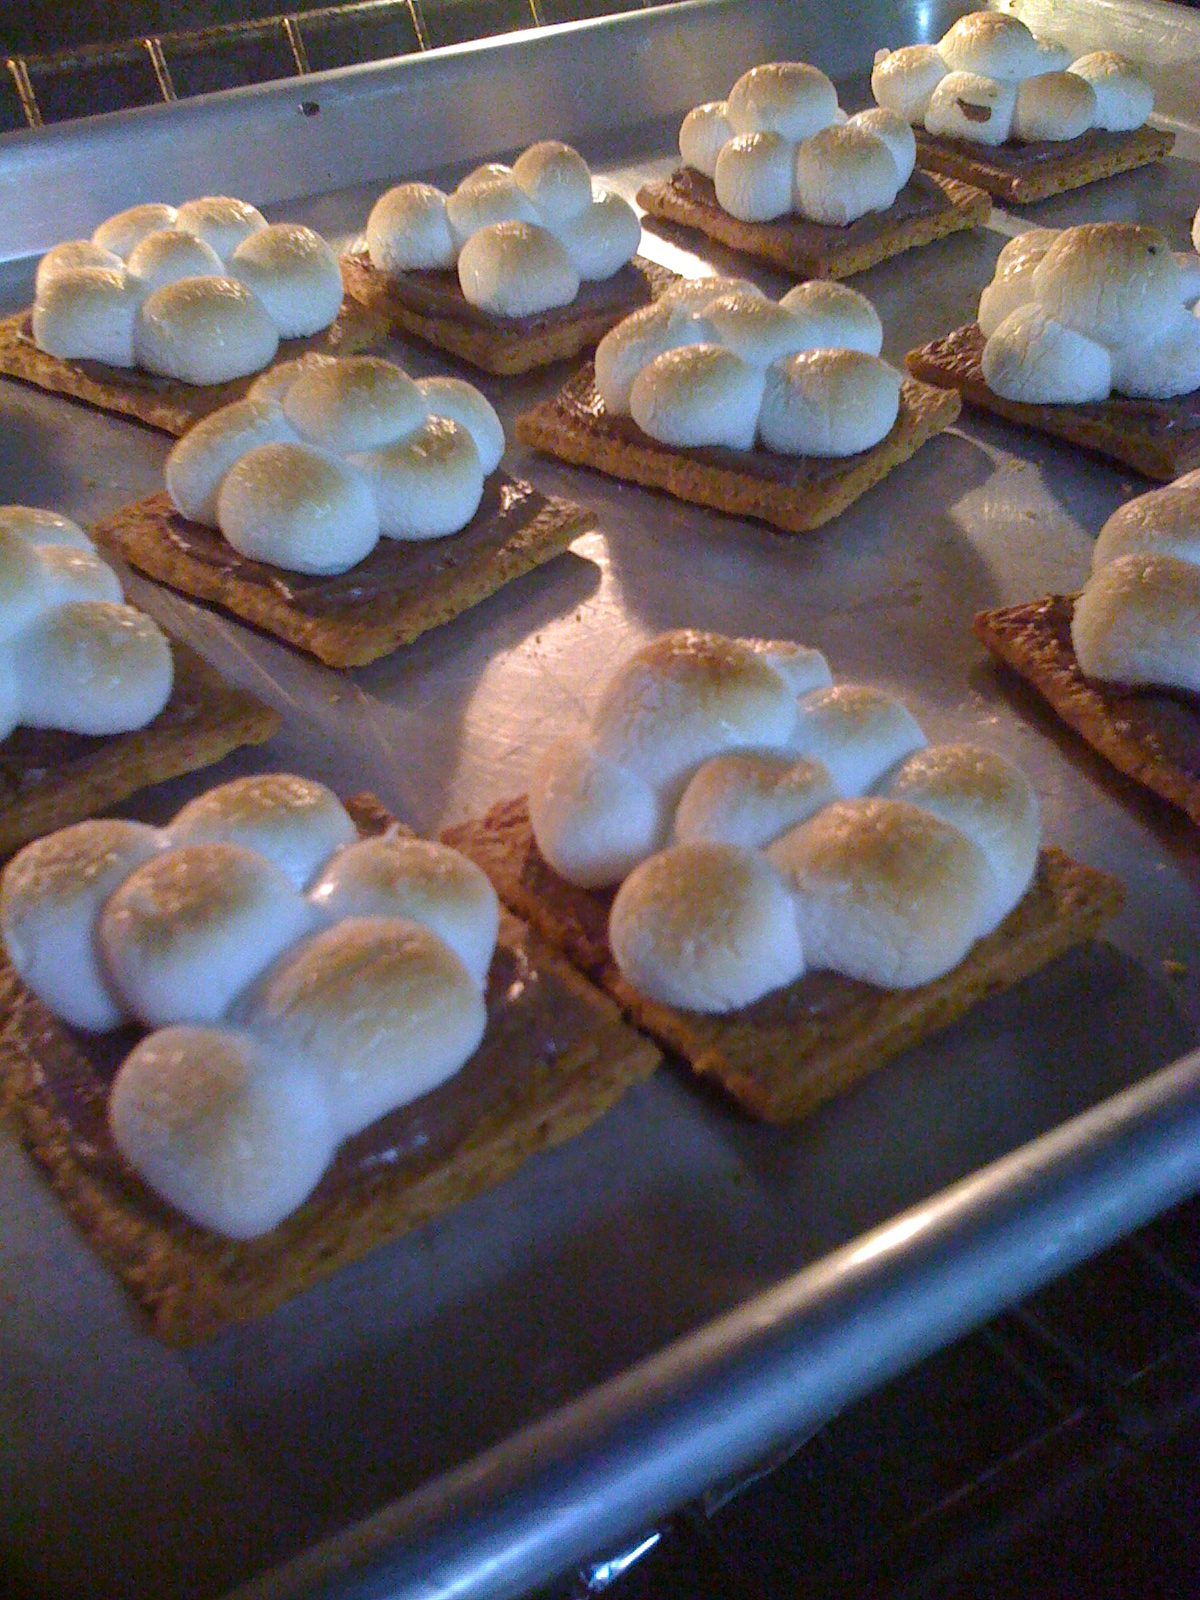
Make Indoor S'mores for any occasion: family game night, movie night, or an overnight party for the kids. They keep well once cooled and wrapped and make a great gift.

Make Indoor S'mores for any occasion: family game night, movie night, or an overnight party for the kids. They keep well once cooled and wrapped and make a great gift.

INDOOR S'MORES

Why wait for a campfire or fire for that matter to make up a batch of S'mores? I have perfected Indoor S'mores and I could not wait to share them with you! Perfect for a party or even just a night in front of the tv, make some of these up for the best-ever comfort food treat. They don't go soggy so you can make them for a picnic or take them to a party as long as you keep them in a cool spot. Make some up and let me know what you think!

INGREDIENTS

1 box of Graham crackers

1 bag of mini-marshmallows

Nutella Chocolate Hazelnut spread

Fill up sheet pans with Graham crackers. Spread each with a thin layer of Nutella. Put 6-7 mini marshmallows on top of each. Put under the broiler for about 2 minutes. Watch to make sure they get golden brown. Take them out and let them cool slightly. Make sandwiches by pressing two together. Eat right that moment or let them cool completely and wrap each with plastic wrap. Keep cool until serving time but do not chill them in the fridge or the cracker will get soggy.

S'MORES POPSICLES

Fudgey-Choco Pops recipe below*

20 mini-marshmallows

1/2 cup graham cracker crumbs

Small plastic or paper cups

Popsicle sticks

In the bottom of a plastic cup, put a small amount of the graham cracker crumbs, about 1 teaspoon for each cup. Add about 1-2 tablespoons of the chocolate mixture and 4 marshmallows, top with another  teaspoon of the chocolate and use a spoon to press the chocolate into the marshmallows. Tap the cup on the counter to make a dense layer. Continue layers as necessary to fill the cup, leaving 1/4" at the top. Allow to set up for at least 30 minutes and add a popsicle stick to each cup. Allow to freeze for at least 4 hours.

These S'mores Popsicles are very simple to make and taste just like their namesake!

These S'mores Popsicles are very simple to make and taste just like their namesake!

FUDGEY CHOCO POPS

1 cup water

2.5 ounces bittersweet chocolate, chopped ( you can sub cocoa- just add 1 tablespoon butter if you do)

1/3 cup sugar

pinch salt

1/3 cup milk (use whole or 2%)

1 T. heavy cream (or you can use half and half)

1/2 t. vanilla

1/8 t. instant coffee (or you can use leftover strong coffee)

Put the chopped chocolate, sugar, and salt in a saucepan over low heat. Whisk in the water, a little at a time as the chocolate melts and the sugar dissolves. Once the chocolate has completely melted, remove from heat. Whisk in the coffee, vanilla, milk, and cream. Chill and cool completely.

And if you want to build a campfire, offer your guests lots of options with my S'MORES BAR!

Simple and delicious... make a S'mores bar for your next get-together so guests can create their own special dessert!

Simple and delicious... make a S'mores bar for your next get-together so guests can create their own special dessert!