
RECIPE: EASY, FAST, AND ALWAYS PERFECT GRILLED CORN ON THE COB

It's just about corn season! To me, nothing says summer more than fresh picked corn and I cannot wait to bite into that first piece of corn from the grill. Some of my friends think it is hard to grill good corn- that it gets dried out, etc. I've got a super easy way to grill corn for a crowd that is perfect every time. Here's how:
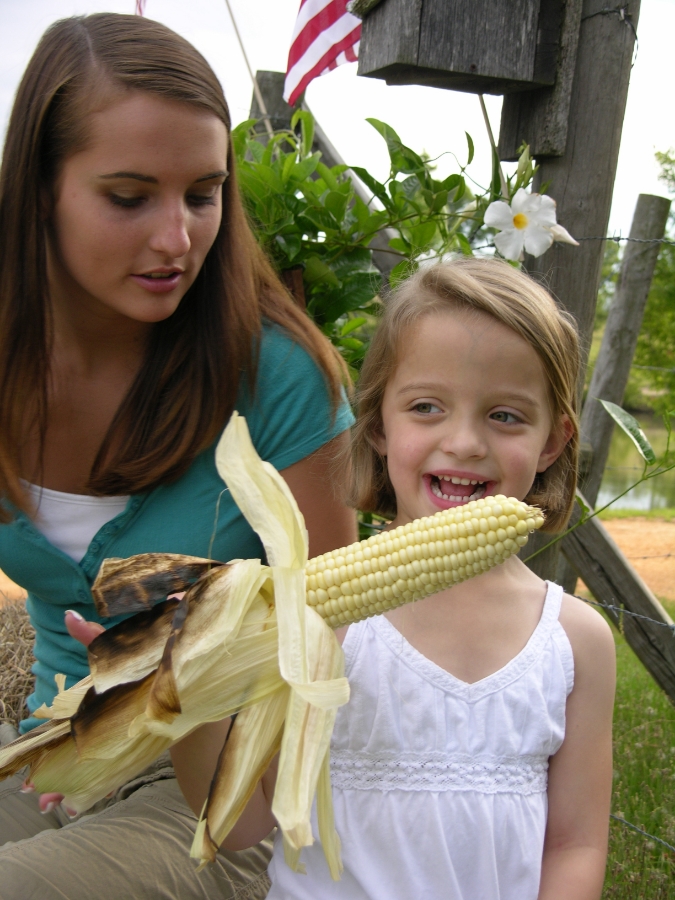
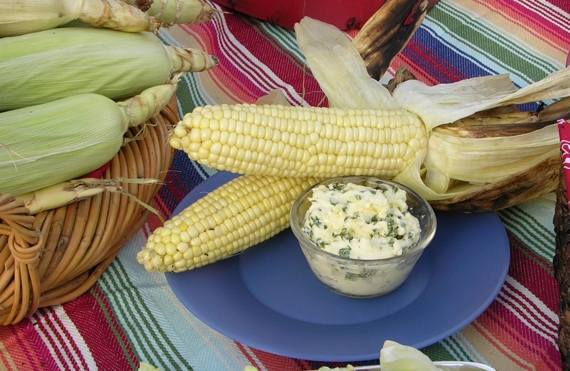
MARTIE'S PERFECTLY EASY GRILLED CORN

SUPPLIES

Large tub or bucket

Large Styrofoam ice chest

Grill (charcoal, gas, wood fire or whatever you like)

Long handled tongs

Oven mitt or heat-proof glove

INGREDIENTS

2 dozen ears of fresh corn in the husk (you don't have to remove the inner silks but it does make it easier for your guests if you do) Estimate 2 ears of corn per guest.

Butter

Salt

Pepper

DIRECTIONS:

Check the ears for any evidence of bugs, etc. Snip the silks off of the tip of each ear. I usually don't slice the bottom off so people have something to hold on to... but you can cut them level if you are using plastic corn holders.

Submerge the ears in cool water and let them soak for at least 30 minutes and up to 2 hours.

While the corn is soaking, fire up your grill. You want a medium heat and an indirect heat zone-so move some of your coals to the outer edge of the grill if you are using charcoal. so you can move the corn off direct heat. Make sure the grill rack is not down too low. You want indirect heat so the husks don't burn. A bit of charring is good but if the heat is too high or the grill is too low over the coals, you'll burn up the husks before the corn cooks inside.

Once the coals are ready, drain the water.

Place the corn on the center of the grill- stay away from the outer edge where there could be hot spots.

Cover the grill and leave it alone for 12 minutes. (you may need to adjust the time if you have a larger quantity of corn)

Open and turn the ears to char the other side. Close the grill and let cook for another 5 minutes.

Remove the corn and immediately put it in the Styrofoam ice chest and put the top on it as fast as you can. Put something heavy on top of the chest to keep the lid down tight.

Allow the corn to continue to steam in the chest until serving time- at least 15 minutes. I usually do this an hour or more before the party and it is perfect to serve when guests arrive. The ice chest keeps the corn steaming hot!

To serve: Put the corn in a big bowl and pass family or simply allow guests to serve themselves. Provide tongs and heat-proof mitts. Guests simply peel back the husks and the silks fall off with it. Set up condiments like butter, salt, pepper, lime, queso fresco, cilantro, or spices.

So easy, so fast, and soooo dang good! Have a trash can nearby where they can dispose of the husks and cob.

Print Friendly and PDF

RECIPE: JENNIE BENEDICT'S FAMOUS BENEDICTINE SPREAD

According to Derby lore and my good friend Traci Badenhausen, you cannot NOT have Benedictine on your menu for Derby parties in Kentucky. She's provided the original recipe from Louisville caterer and cookbook author Jennie Benedict, who made it famous years ago. It is so famous, it has its own Wikipedia page and a Pinterest board! Her first cookbook, Blue Ribbon Cooking, was published in 1902 and while it did not originally have the recipe for Benedictine, it now does, according to Wikipedia. Used for cucumber tea sandwiches or as a spread for other sandwiches, you can use it for a veggie dip, too.

While you can barely see it, there's Benedictine Spread in those little tea sandwiches. It's often used for dip as well.

While you can barely see it, there's Benedictine Spread in those little tea sandwiches. It's often used for dip as well.

JENNIE BENEDICT'S FAMOUS BENEDICTINE SPREAD

INGREDIENTS
1 cucumber
1 onion

8 ounces cream cheese, softened
1 teaspoon salt
A few grains of cayenne pepper
2 drops green food coloring (optional, but a local favorite)


DIRECTIONS:
Peel and grate the cucumber, then wrap it in a clean dish towel and squeeze the juice into a dish. Discard the pulp. Peel and grate the onion, then wrap it in a clean dish towel and squeeze the juice into a dish. Discard the pulp. (Use a juicer if you prefer)

Combine three tablespoons of the cucumber juice, one tablespoon of the onion juice, cream cheese, salt, pepper and food coloring in a bowl. Mix with a fork until well blended. Serve as a dip or as a sandwich filling.

Print Friendly and PDF

SALAD IN A JAR: LAYERED SPINACH AND STRAWBERRY SALAD WITH POPPYSEED DRESSING

This is one of my all-time favorite party recipes...  Serving guests a salad in a Jar is so easy, so versatile and it can be used for so many different occasions. In fact, it is also perfect for lunch on the go or for the kids. Layer your favorite ingredients in a jar and chill. When you are ready to serve, simply shake it up. That's it!

If you are going to prep the day before your event, you probably should add the dressing just before serving so everything doesn't get soggy and just put it right on top. But you can prep up to four hours before with the dressing in the bottom and you'll be fine... but keep the jars chilled on ice, in the fridge, or in a cooler. And it is a perfect solution for picnics, too!

So pretty, so functional and so delicious! Layered salad in a jar makes serving and eating salad at a party so much easier! No grappling with tongs or trying to balance everything to add dressing.

So pretty, so functional and so delicious! Layered salad in a jar makes serving and eating salad at a party so much easier! No grappling with tongs or trying to balance everything to add dressing.

LAYERED SPINACH AND STRAWBERRY SALAD IN A JAR WITH HOMEMADE POPPYSEED DRESSING

Makes 6

INGREDIENTS

1- 9 ounce package of fresh baby spinach leaves, wash and remove the stems

1- 16 ounce container fresh strawberries, washed, dried, hulled, and sliced

1- 15 ounce can Mandarin orange slices, drained

2 cups walnuts, toasted and roughly chopped

1- 6 ounce container Belle Chevre Belle and the Bee Breakfast goat cheese (or if you cannot find it, make your own by swirling honey into goat cheese to make it creamy and slightly sweet)

Poppyseed Dressing recipe  (or your favorite dressing

DIRECTIONS:

Start by spooning about 2-3 tablespoons of dressing into the bottom of the jar. Use enough so you can see the layer of dressing. Next, add about 1 1/2 cups of the spinach leaves. Layer the strawberry slices around the outside of the jar and work your way in so they look pretty. Do the same with the orange slices. Next, add the walnuts and top with a thin layer of the goat cheese. You want to be able to see each layer- the colorful layers is what is so pretty about this salad. Secure the lid and chill until serving time.


HOMEMADE POPPYSEED DRESSING

One of my summer favorites, this is also a delicious dip or dressing for fresh fruit.

INGREDIENTS

1 1/2 tablespoons apple cider vinegar

1/2 teaspoon dry mustard

1/2 teaspoon honey

1/4 teaspoon lemon juice

1/8 teaspoon Kosher salt

1/4 teaspoon sugar

1/8 cup sweet white onion, like a Vidalia, chopped

1/2 cup plain yogurt (some people prefer mayo instead)

2 1/2 tablespoons vegetable oil

3/4 teaspoon poppyseeds

a bit of water to thin, if desired

DIRECTIONS:

Add everything but the oil and the poppyseeds into a blender or food processor and blend until very smooth and there is no trace of the onion. Reduce to the lowest speed and stream in the vegetable oil. Turn off the blender and add the poppyseeds. If you find it too thick (which I love for fruit) you can thin with a bit of water for salad dressing.  I use an immersion blender for this recipe. It's fast and easy to clean up.

Print Friendly and PDF
