A Bible, guitar, a cookbook, even Jenga game blocks! Brides and grooms are coming up with unique and creative ways to remember their wedding day by asking guests to forego signing a typical guest book in favor of something more personal to them. My good friends at The Sonnet House, one of my favorite wedding and event venues (located in Leeds, Alabama) have shared some wonderful and personal variations on the traditional wedding guest book. Here are some of my favorites...
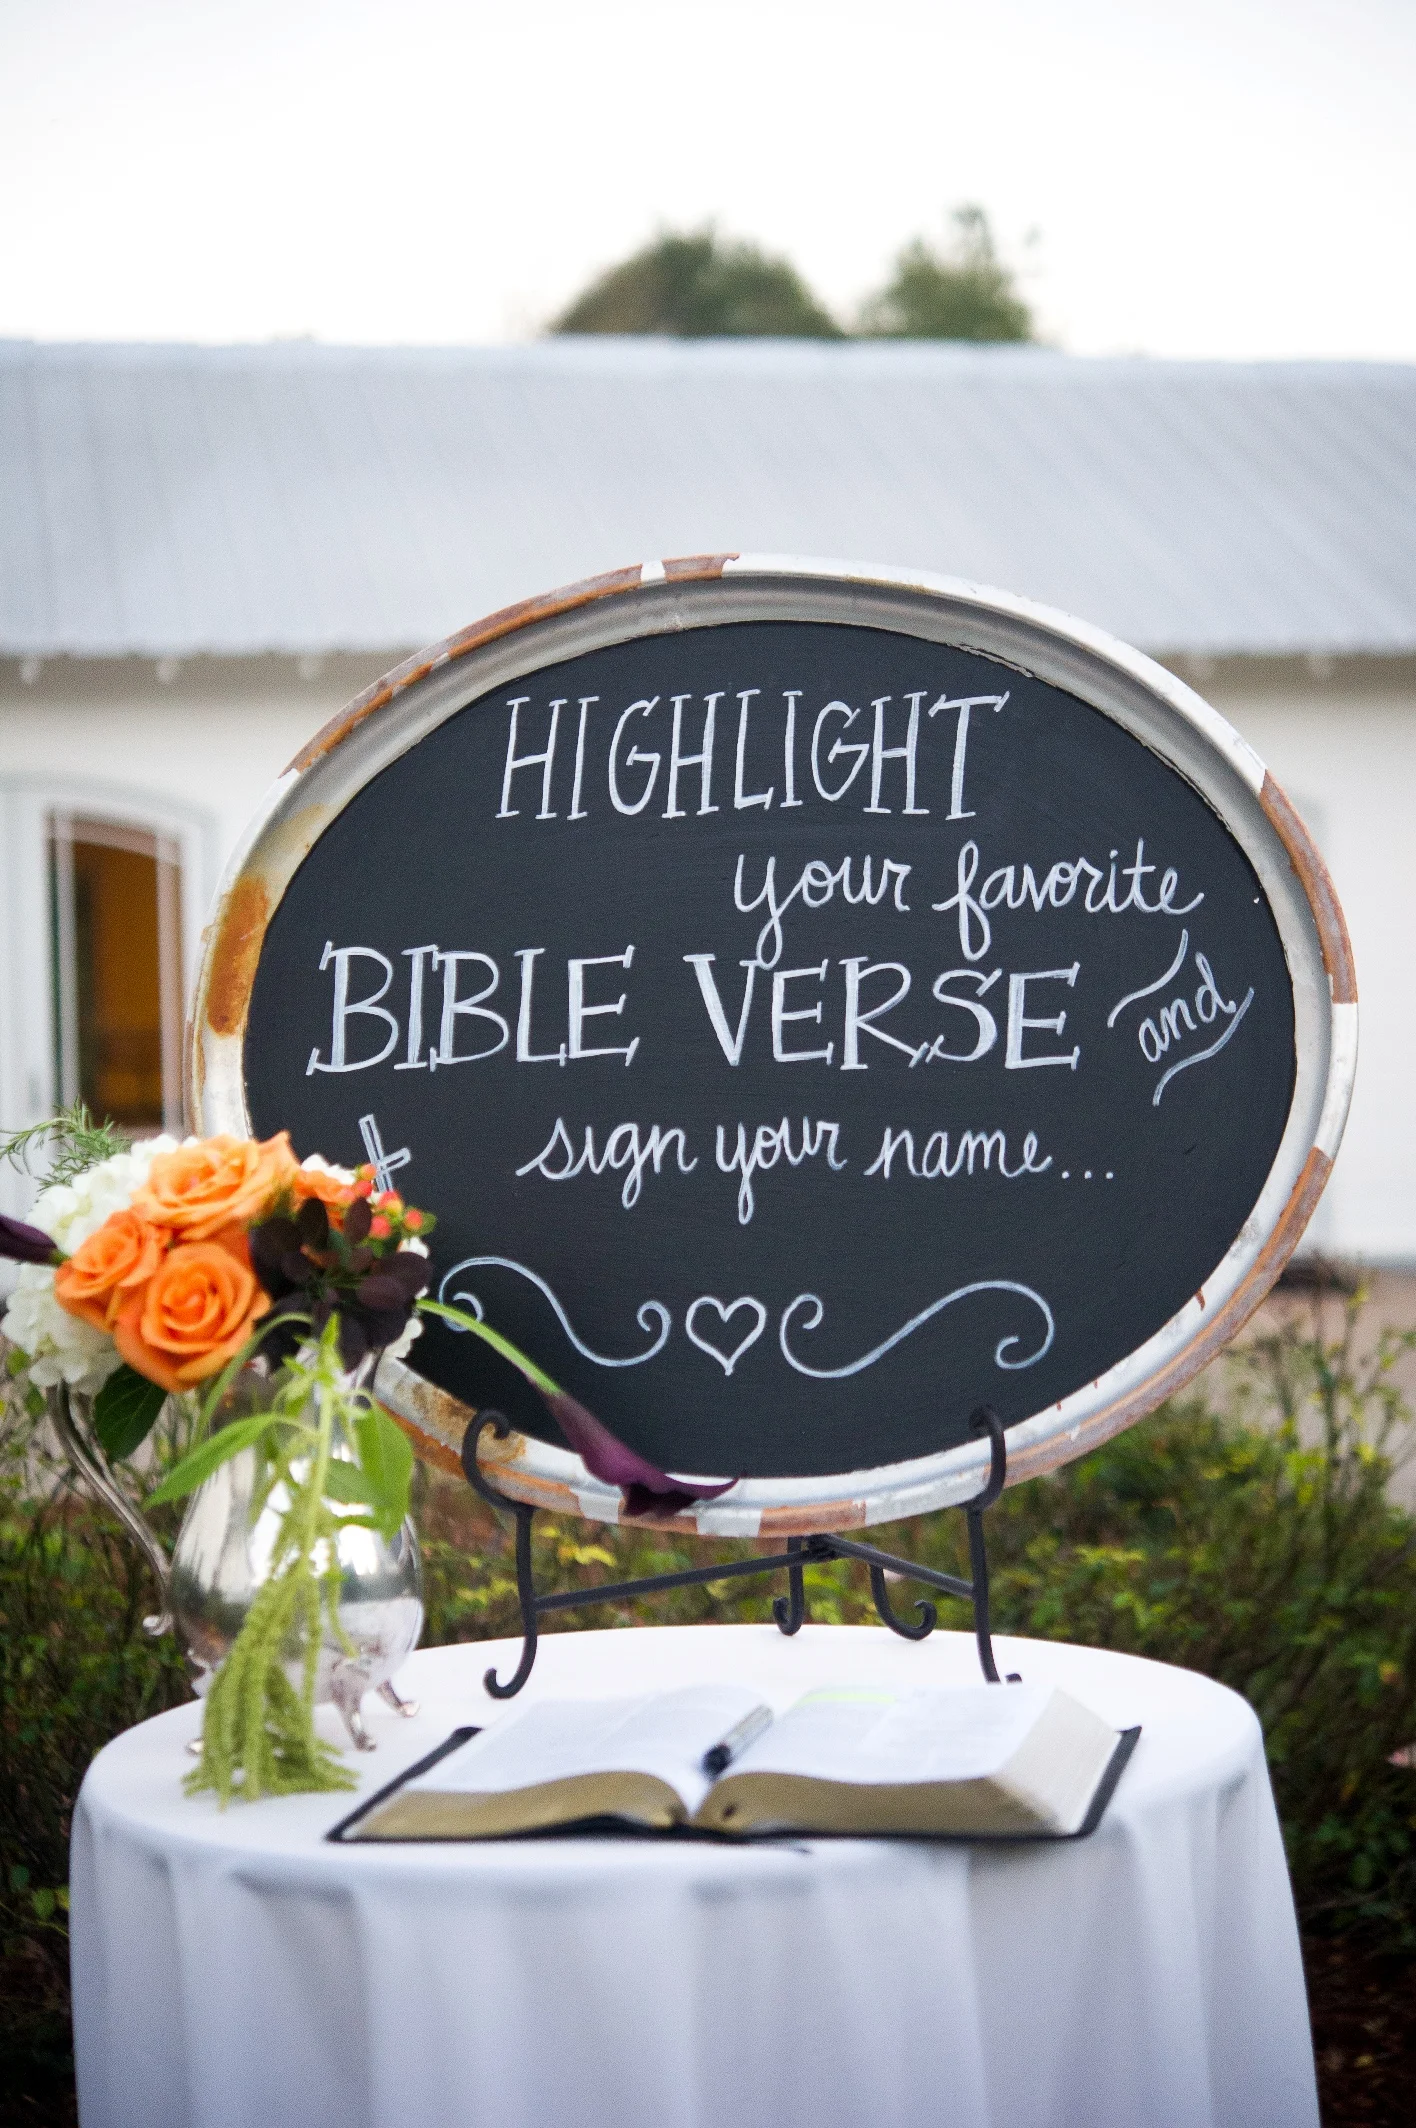
Photo by Alisha Crossley Photography at The Sonnet House Leeds, Alabama
This bride and groom asked their wedding guests to highlight a favorite bible verse in a family Bible and sign it. Each time they look through the Bible over the years of their marriage, they will be reminded of their wedding day and the family and friends assembled to wish them well.
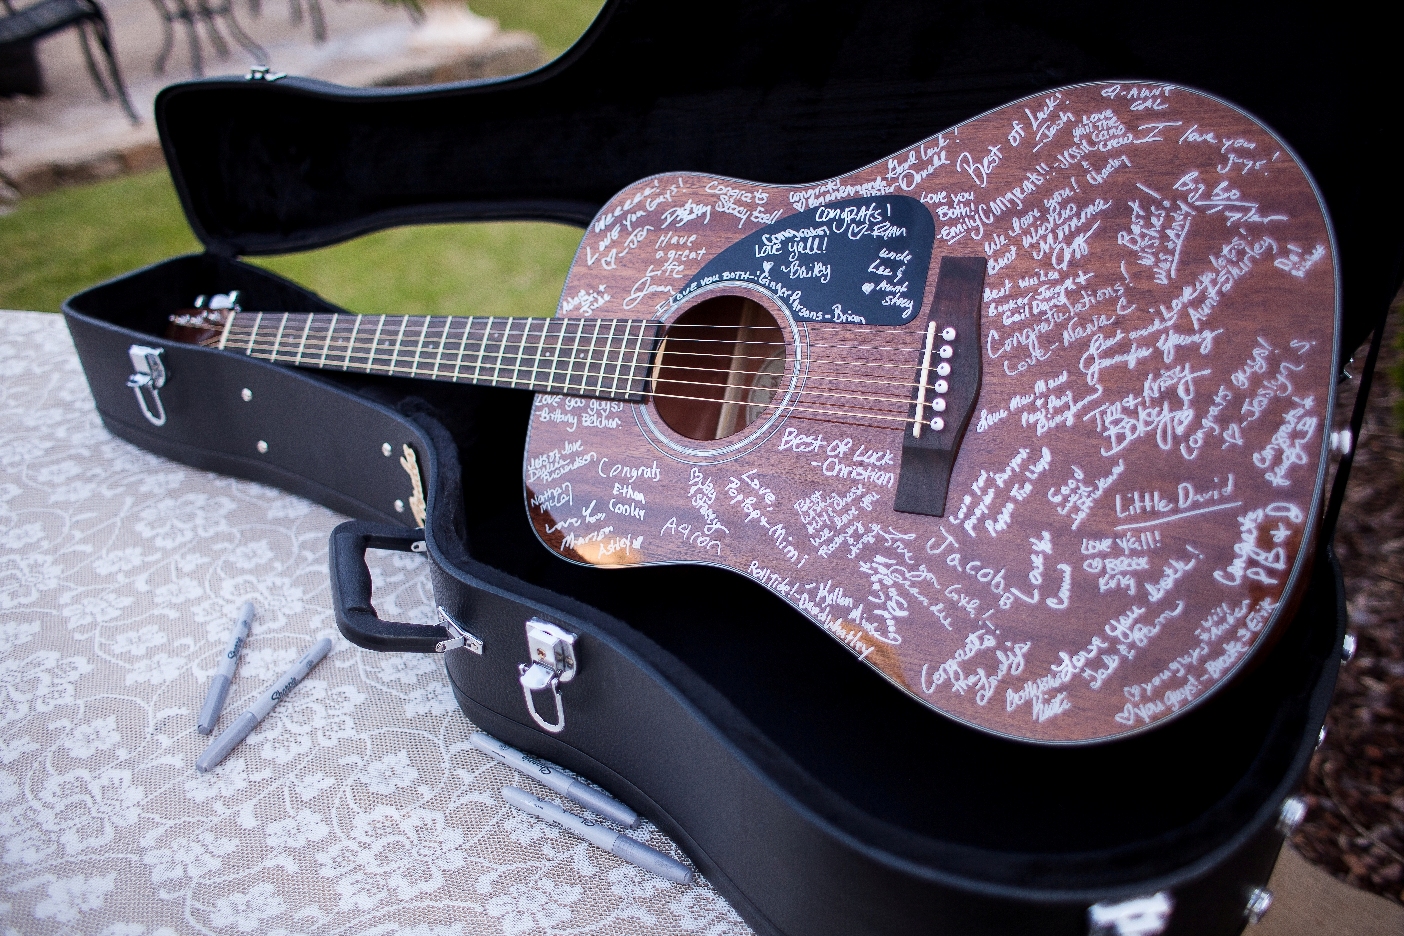
Photo by Amy Carson Photography taken at The Sonnet House, Leeds, Alabama
This couple had their wedding guests sign a guitar which they will hang on a wall in their new home as a reminder of their wedding day.

Photo by LaShay Photography taken at The Sonnet House, Leeds, Alabama
In keeping with the selfie station trend you find at many events these days, using a Fujifilm instax™ Mini 8 camera and smartphone wireless printer, this couple had family and friends take a selfie which was printed on the spot and clothespined to a rustic board for the wedding. Later, the couple will assemble the photos into a keepsake wedding guest album. Find the camera at Michael's, Wal-Mart, Amazon, etc. From $70.

Photos by Rob and Wynter Photography taken at The Sonnet House, Leeds, Alabama
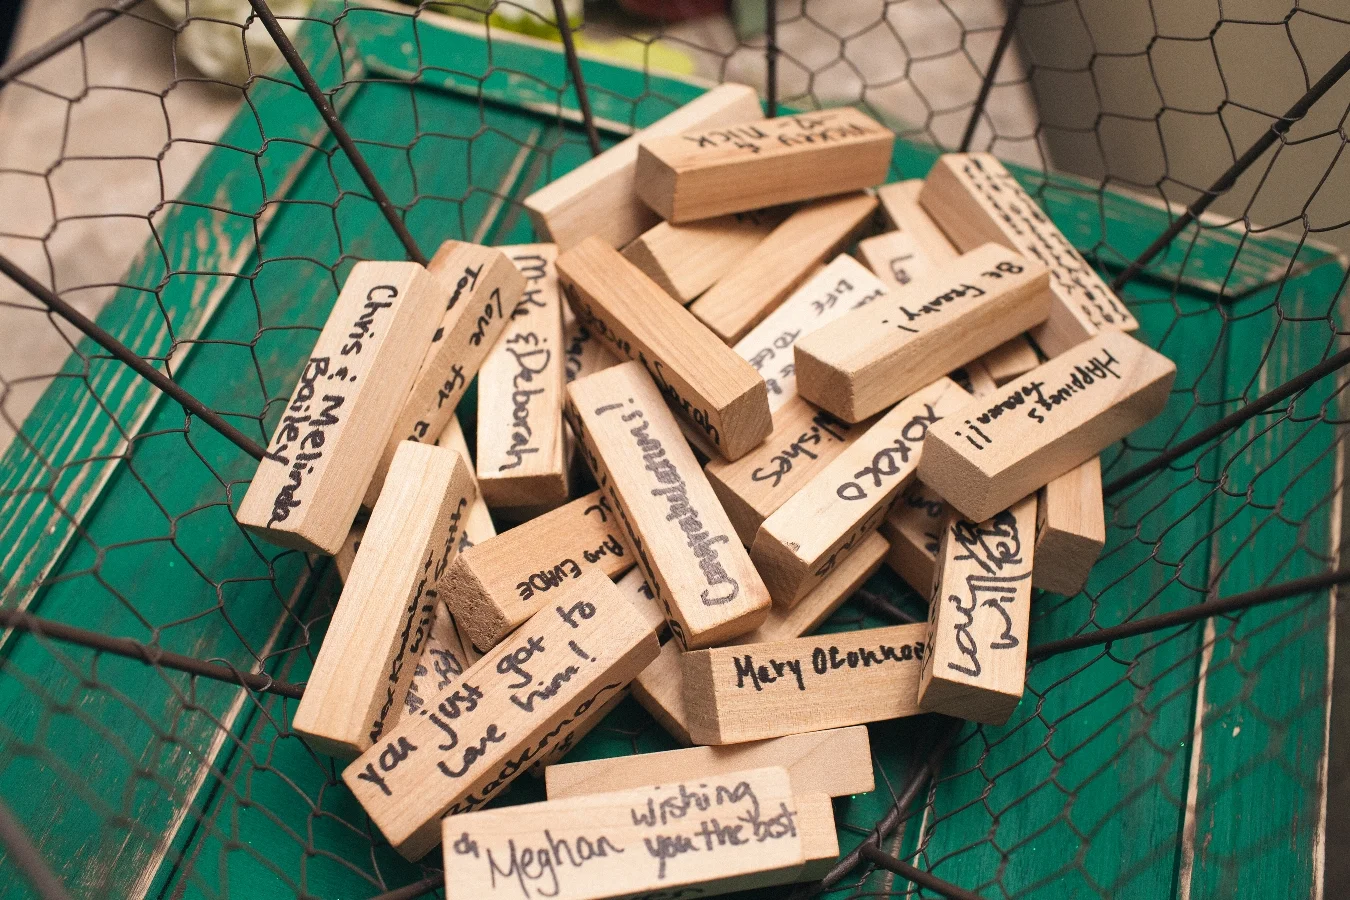
This creative couple will be able to relive their wedding day each time they pull out the Jenga blocks! If you have a large guest list, you may need to provide several games to accommodate all your guests good wishes. Afterwards, these wooden blocks can be fixed to a frame and hung as a piece of art.

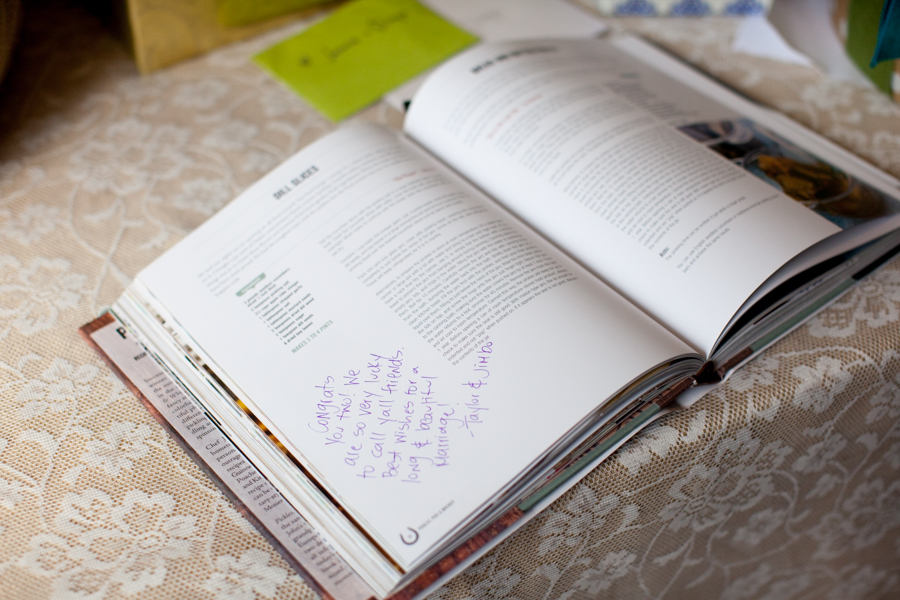
Photo by SCB Photography taken at The Sonnet House, Leeds, Alabama
One of my favorite wedding guest book ideas for foodies, cooks and food lovers: have wedding guests sign pages in a favorite cookbook! Love this! Maybe one day, a bride and groom will have guests sign MY cookbook!
Many thanks to Ellen, Jared & Corey at The Sonnet House and all of the couples and photographers for the inspiration.