SUMMER FUN: HOW TO MAKE A S’MORES BAR!

Want to add a little DIY fun to any outdoor party or just make some memories on a summer night? Build a S’mores bar! It’s really easy to create some old school fun… and who doesn’t love S’mores?

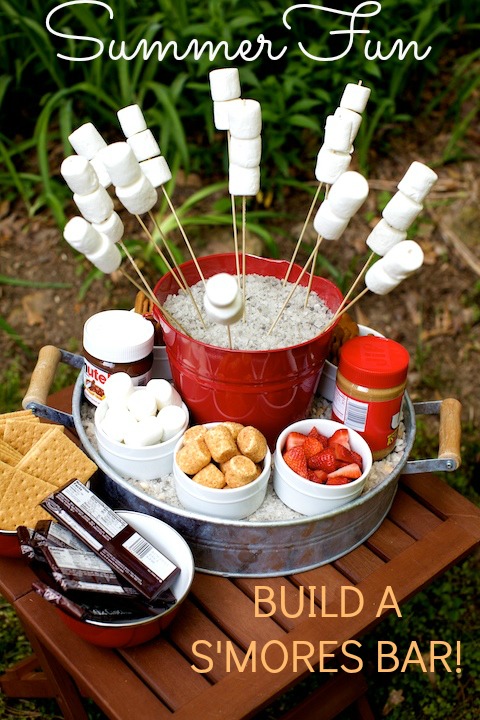
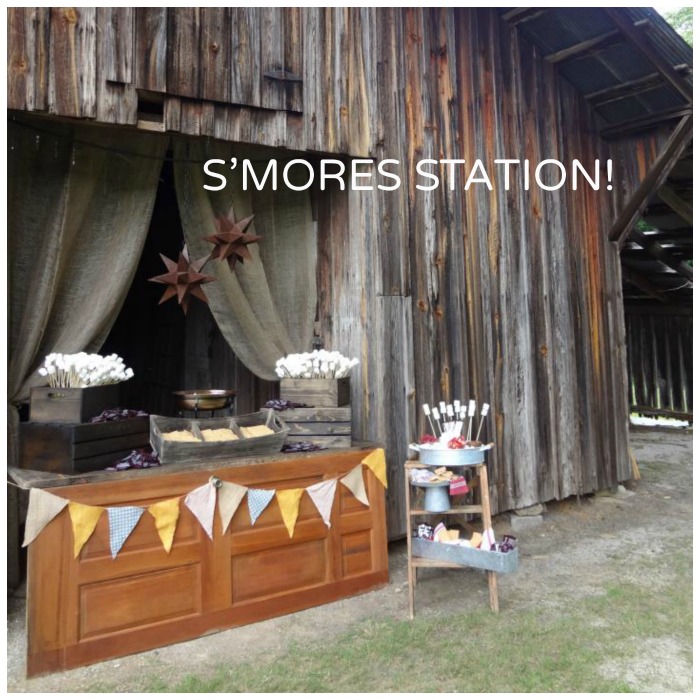
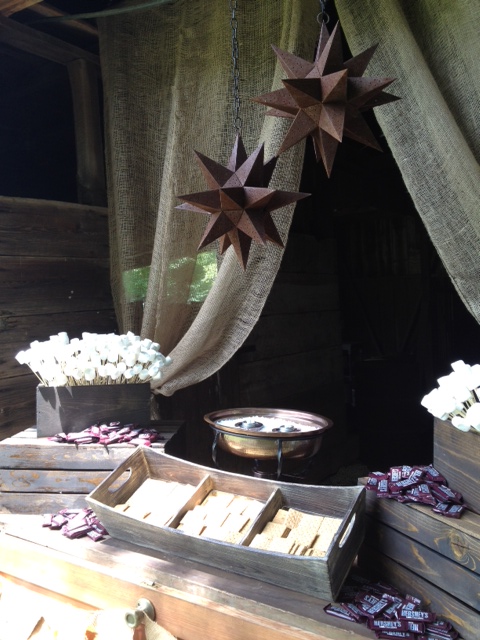
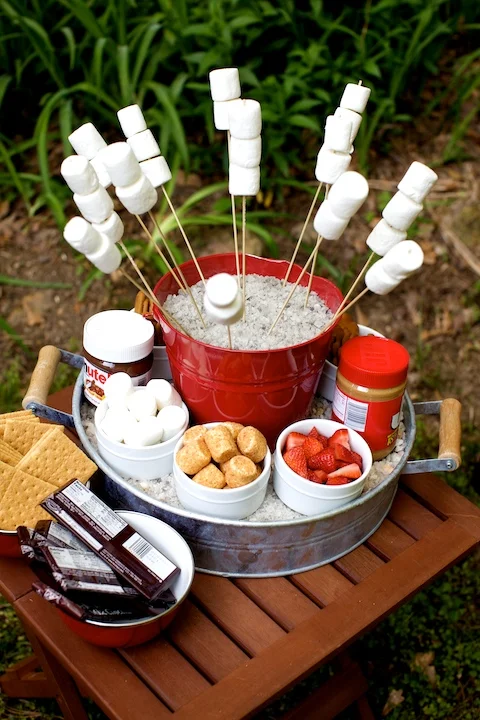
First question: what kind of party are you having? Casual? Elegant? Don’t worry. You can create a S’mores bar with unique ingredients to suit the style and theme of your party. Use containers and vessels to suit the decor and mood of your event. Since this one was very rustic, we used wood, tin and burlap to decorate the table and display all of the toppings. 

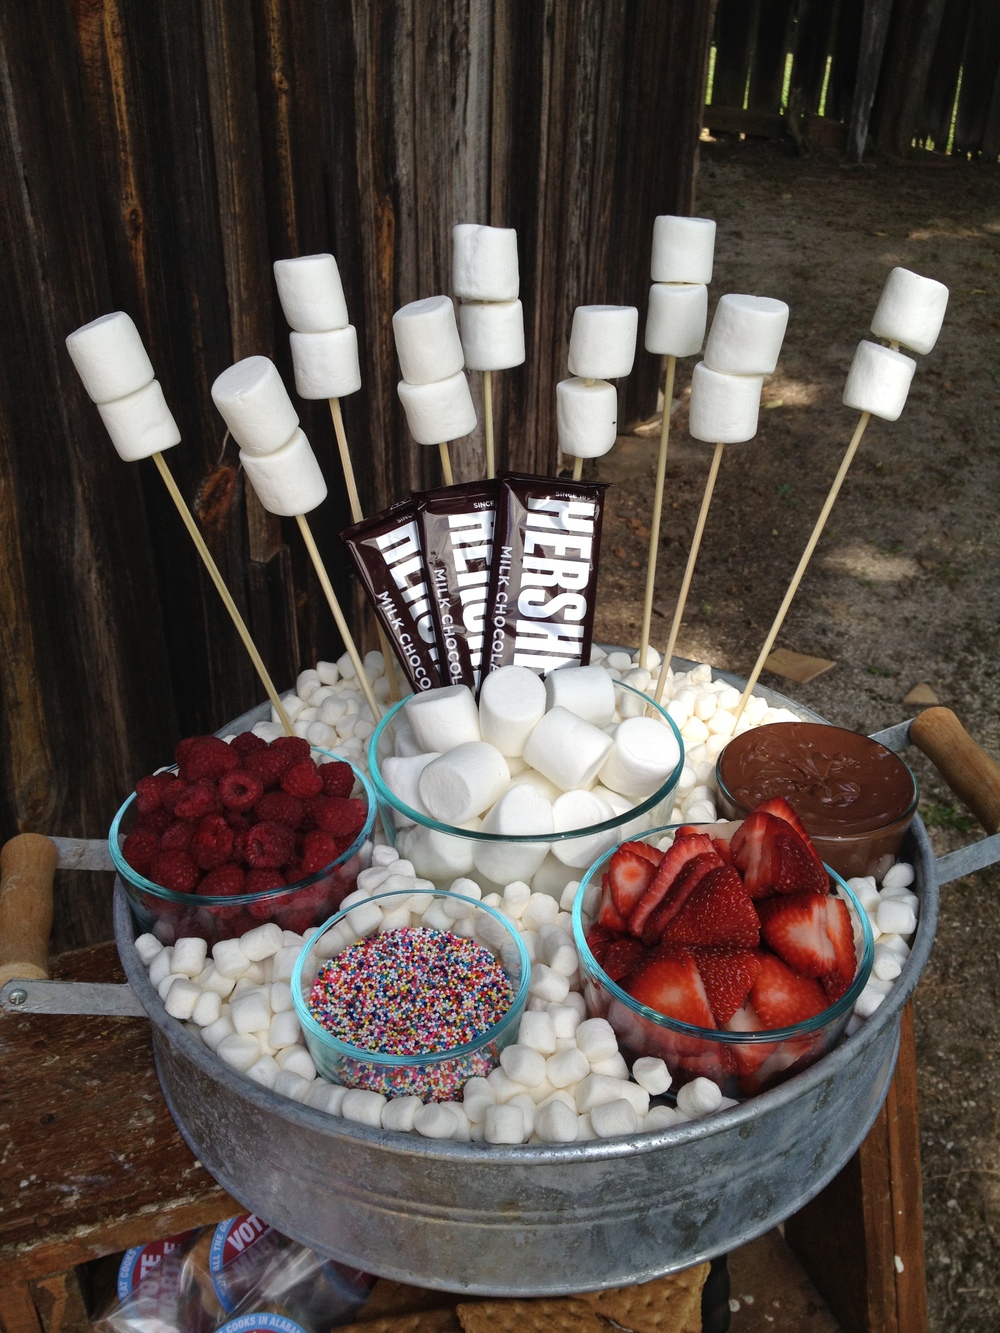
I like to make the marshmallows easy to reach so I create a little “sculpture” with them. For roasting, use something you can put into the fire— wooden skewers work well, but only if you soak them in water for at least 30 minutes first so they don’t burn up. Since you are using skewers or pointed objects, make sure you have adult supervision when you have children on the guest list.

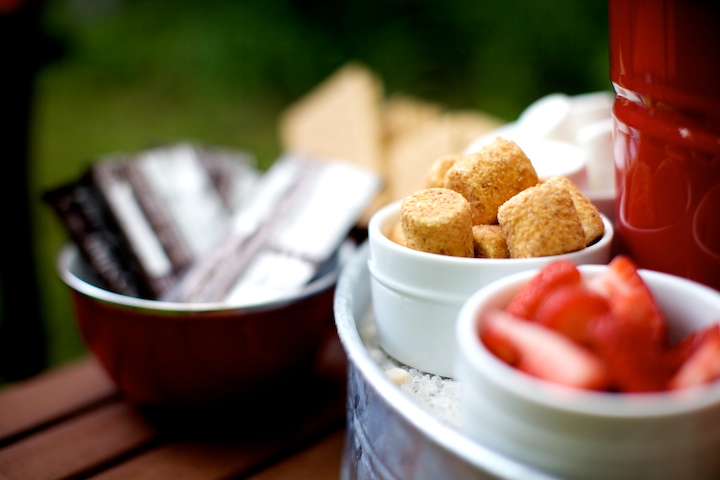
Select ingredients that will suit your menu. Traditional s’mores ingredients include: Hershey bars, graham crackers, and Jet-puffed marshmallows. New twists include: Nutella chocolate hazlenut spread, sliced bananas, sliced strawberries, raspberries, coconut toasted marshmallows or peanut butter. Add different types of cookies: Biscoff, Almond Thins, and ginger snaps are all good choices but any flat cookie will work.

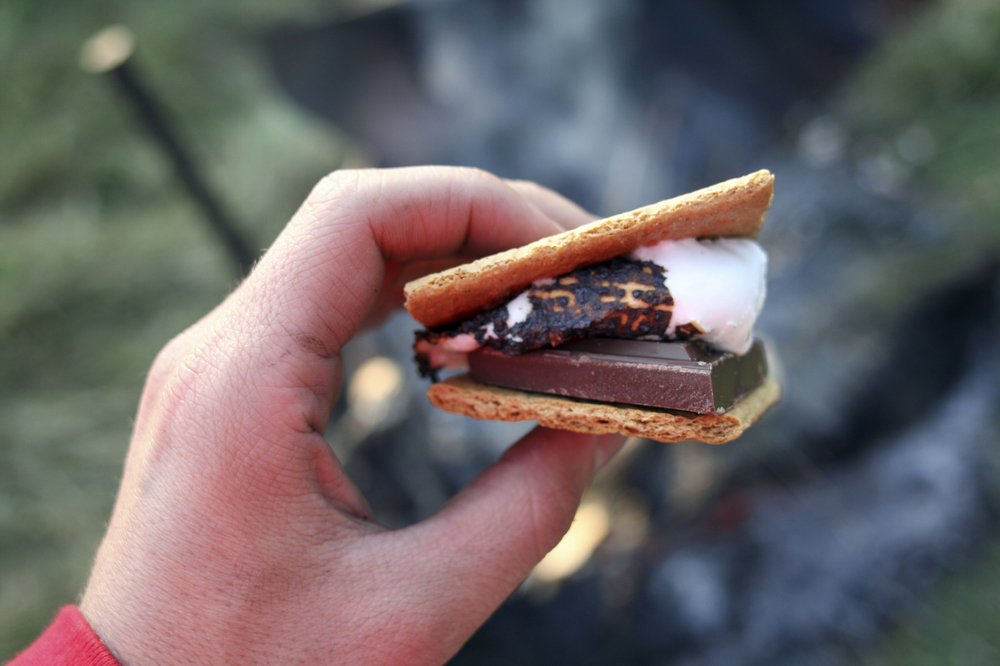
Now, simply toast up your marshmallows to the desired degree of doneness. I don’t like mine too burnt, but I know some of you do. Spread Nutella on your cookie. Layer sliced strawberries or raspberries. Add your toasted marshmallows and top with another cookie spread with Nutella. Your guests will love this variation on a campout classic!

Martie Duncan How to Make a S'mores Bar

S’MORES BAR INGREDIENT LIST

Almost any toppings you find at an ice cream or yogurt shop will work for a S’mores bar!

  • Hershey Bars
  • Nutella Spread
  • Dulce de Leche or Caramel
  • Peanut Butter
  • Almond Butter
  • Mini Chocolate Chips
  • Marshmallows
  • Toasted Coconut Marshmallows
  • Orange Marmalade
  • Sliced Strawberries
  • Sliced Bananas
  • Raspberries
  • Sprinkles
  • Shredded Coconut
  • Chopped Peanuts (be sure and label any nuts for guests with allergies)
  • Chopped, Toasted Hazelnuts
  • Chopped Pistachios

....And a variety of different cookies:

  • Graham Crackers
  • Cinnamon Graham Crackers
  • Biscoff Cookies
  • Ginger Cookies
  • Oatmeal Cookies
  • Thin Mints or any you think would be delicious!
Print Friendly and PDF

RECIPE: MARTIE'S BEST EVER STEAKHOUSE STEAK WITH HERB BUTTER

If you are a steak lover and think the best steak can only come from your grill, think again. My cast iron skillet will deliver a steakhouse quality steak and in record time, too. Add the compound butter at the end and you may give your grill away. This has long been one of my most posted and shared recipes… and I think it is because it is just so easy and so good. This is the perfect recipe for Father’s Day, Game Day or a romantic dinner for two. The secret is in the sear… make sure you really have a hot pan and don’t turn your steak too soon. You want a nice char before you flip it.

Martie Duncan Skillet Steak

MARTIE’S STEAK HOUSE STEAK IN A CAST IRON SKILLET

Skill level: Easy    Prep Time: 15 minutes

Cook Time: 10-12 minutes

Essential equipment: cast iron skillet, meat thermometer

MEDIUM RARE 130-135°

RARE 120-125°

MEDIUM 140-145°

INGREDIENTS

1 steak of your choice, I prefer a T-bone, bone-in rib-eye or a Porterhouse; not cut too thick

1 teaspoon kosher salt

¼ teaspoon fresh cracked pepper

2 tablespoons unsalted butter for the skillet plus 1/4 cup for the herb butter

2 tablespoons olive oil

Fresh finely chopped herbs

For the herb butter: place 1/4 cup butter at room temp in a small bowl and use a fork to sort of mash and whip it until soft. Add finely chopped herbs of your choice—basil and thyme are my favorites. Chives are stronger but also nice. About a tablespoon is all you need but that’s up to you if you want more— add more. Line a small ramekin or bowl with plastic wrap and spoon the butter mixture into it. Wrap the plastic over the butter and chill well. You can make this a few days in advance and unmold it when you are ready to use it.

For the steak: Preheat the oven to 450 degrees. You will have to vary your cooking time based on the degree of doneness you want for your steak. Let the steak sit out at least 15 minutes to take some of the chill off before you cook it. Heat a large cast iron skillet over medium heat. Add a tablespoon of butter and a tablespoon of good olive oil to the pan and let them melt together. You may need more depending on the size of your pan. Increase the heat to medium high.

Season both sides of the steak liberally with salt and pepper.

When the butter is melted– it burns easily so watch out—and the pan is very hot, put in your steak and sear it well on both sides. Do not pick up the steak or move it around. Let it sear on one side before turning it— about 3 minutes per side depending on the heat and the size of your steak. After you’ve seared the steak on both sides, carefully move the pan to your preheated oven. After the steak has been in the oven for about 3 minutes, carefully open the door (watch out as there will be quite a lot of steam) and put a large slice of the herb butter on top of the steak– it will melt down over the steak and add a wonderful flavor during the last minutes of cooking.

I like my steak just under medium so I cook it in the oven for about 5 minutes or until the meat thermometer reaches about 140 degrees. Remove from the oven, place off of heat and cover with foil. Let the steak rest for at least 5 minutes so the juices will redistribute. The steak will actually continue to cook a bit during the resting period so I remove it from the oven just under the desired temperature.

COOKING FOR A CROWD

If you have a big crowd, you will find this recipe hard to do unless you have several skillets. I typically reserve this recipe for smaller, more intimate groups but for 4 or more, I’ll use a Porterhouse cut and that gives me a filet and a New York Strip from each steak so I can serve 2-3 people from one steak.

TABLES & DECOR: COTTON CANDY TREE AND CANDY TABLE IDEAS

We did this adorable cotton candy tree and candy table for my sweet friend Kristina’s wedding and it has been the most shared PIN I’ve had on Pinterest. What a fun idea for a wedding reception, a birthday party or centerpiece for a candy bar or candy table buffet for any occasion: anniversaries, baby showers, graduation parties, sweet sixteen parties, Quinceañera or even school parties for Easter or Valentine’s Day parties. Since you can find or make cotton candy in almost any color, it is a great way to tie a color scheme to your party theme.

Martie Duncan Make a Cotton Candy Tree

COTTON CANDY TREE HOW-TO

Decide on a color for the candy. You can readily find cotton candy in lots of colors- even at the dollar store and Wal-Mart. Kristina’s wedding colors were blue and green so she opted for blue cotton candy. There are lots of online stores for cotton candy with tons of colors and cheaper prices if you have the time to order. You can always make your own cotton candy but you’ll need to use it quickly; it will not hold more than a day before it begins to shrink and  sort of melt. If the weather is very humid, you’ll need to use it immediately.

Get tiny glycine envelopes or plastic treat bags from the party store or hobby store. Make up labels with your name, monogram, or a photo and affix them to the bag. Oriental Trading Company has the clear mini-treat bags $1.99 for two dozen.

You’ll need a tree branch for the arrangement. A manzanita branch works well. I got branches from the yard… but hobby or floral supply stores have several different types if you don’t happen to have a yard.

Secure the branches in a tall vase. You’ll need something to really weight it down. The “trunk” part of the branch needs to be pretty long if you are going to use a tall vase. We used river rock in the base for weight and filled the vase with water so it was very heavy. Be sure to push the tree to the center of the table so children will not be tempted to pull on it. You should not use a glass container if the party is for kids. Use a plastic vase or a sand pail filled with sand (add a little water to wet the sand for weight) for a kids party.

Tie the bags of cotton candy to the tree with matching ribbon. We also tied several pairs of mini craft (not pointy) scissors to the tree so guests could snip the cotton candy. To make sure the centerpiece tied in with the other wedding decor, I clustered some Hydrangea in wedding colors around the top of the vase.

Under the cotton candy tree, we put glass bowls, cylinders, and vases filled with different candies along with mini Chinese take-out boxes so guests could take home a treat from the couple. Easter candy is out so now would be a good time to find an assortment in the stores… but the day after Easter, all of the left-over candy will be 1/2 off so stock up for your next party or wedding.